Optimize your Ecommerce Website for More Conversions

Like all businesses, Ecommerce stores are also in the race of chasing numbers. They make efforts to increase the website traffic, thereby, to reach a satisfactory conversion rate mark. Website traffic also happens to be essential for your business to thrive. Unlike brick and mortar stores, ecommerce stores can take numerous initiatives to increase their website’s traffic, optimize performance, and boost sales.  

When we talk about boosting the conversion rate, we first need to understand the conversion funnel and how it works. Conversion funnel aka the Buying Cycle consists of three steps – 

  • Awareness:  It is when the customer becomes aware of the product and acknowledges the need for it.
  • Evaluation: It’s the next step, where the customer has recognized the need and is contemplating whether your products match their requirements. 
  • Purchase: This is the final step of the funnel! Here, the potential customer makes up their mind and finally makes a purchase.

Understanding the customer funnel will now help you define goals to meet your customer needs for every step of the cycle. With that in mind, the key focus should now be on evaluating the information and data you have gathered from the conversion funnel. 

  • Do your products match the needs of your customers?
  • Are your competitors providing a better buying experience?
  • How effortless is the customer’s journey from identifying the need to purchasing the product?

We recommend – 

  • Product copy should be concise and informative 
  • Website usability shouldn’t become a bottleneck as it has a major influence on the purchasing decision. 
  • Positioning of the primary action buttons like ‘Buy Now’ should be at the top of the visual hierarchy and not at the bottom. 

Optimizing the conversion rate

Analyzing your store for gaps and using the finding to boost sales is known as optimization. Generally in an analysis, various page elements are put under a lens to look for performance optimization possibilities. Some of those on-page elements that contribute to conversion are: 

  • Headlines
  • Descriptions
  • CTA button placement
  • CTA button color

One of those widely adopted conversion rate optimization techniques is A/B Testing. It lets you simultaneously test and analyzes different executions of the same page elements with live users. It saves time and validates ideas with the intended users. The results from tested variants are then compared to see which one yielded better results as far as conversions are concerned. 

Choosing the elements to optimize for conversion

We have a long list of tried and tested elements that are bound to aid in page performance significantly. Some of them are listed below to get you started. 

Informative Elements

  • High-quality photographs: It’s all about the first impressions. In a digital world where customers don’t get to touch, feel, or try the products they are buying, high-definition photographs come to the rescue. Poor or no pictures are the easiest way to drop-offs. Use multiple angles and provide hover to zoom for details.  
  • Product descriptions: Go into as much detail as possible when describing your product. Accurate and honest descriptions sell more products. Don’t toot your own horn, try to help the customer with your copy instead. 
  • Videos: Does the work of pictures, but better. Videos make you seem like you care about your customers enough to provide every possible detail to help them make an informed decision.  
  • Product reviews: Arguably the easiest and the most effective way to build customer trust. Try to engage and pro-actively ask for reviews but don’t be too intrusive. 
  • Site search: Optimize your search so that it improves your product’s visibility. Visibility can directly impact your conversion just as any other digital asset. 

Usability Elements

These elements are optimized to make the experience as easy and satisfactory as possible. 

  • Hyper personalization: Use customer shopping history to show the products they are interested in. This will filter the noise while also reducing the cognitive load and making the ‘Add to cart’ action instinctive. 
  • Mobile optimization: It’s no secret that most of your users like to shop on mobile. It’s the only reason you need and would want to focus on the mobile experience.  
  • Get Wish Lists: Also known as ‘Save for later’ or ‘Favorites’. This helps people curate a list of products that they want to remember and possibly buy at a later date. If they can easily access products they liked earlier, they are more likely to complete the transaction. 
  • Real time assistance: Integrate an option for people to opt for customer service assistance when needed in real-time. 

The Checkout

Cart abandonment is the real-life equivalent of a customer dropping your product on the shelf and stepping out of the store. Losing out on potential customers is heartbreaking, whether it’s in the real world or online. It’s majorly attributed to a poorly optimized checkout process. Poor or confusing design decisions for shopping carts could also be one of the contributing reasons for incomplete transactions. 

How to ensure guaranteed conversion?

  • Cut down the steps to checkout: Shave off any unnecessary steps to help your customers check out faster.
  • NO hidden prices: You wouldn’t want to shop at a store where the product page price differs from the checkout price. Keep pricing transparent as hidden prices are cited as one of the most common reasons for cart abandonment.  
  • Remind users of incomplete transactions: Even when you’re doing everything right, you will find that carts are still being abandoned. The reason can be as simple as your user being bad at multitasking. Just remind them in emails that the order is incomplete. 

When followed carefully, the results these optimization techniques yield is staggering. It might seem basic at first but consistent efforts compound and contribute to big impressive sales numbers. 

We hope this practical piece curated from our experience in ecommerce will help you drive sales. And if you need someone else to handle these optimizations for you while you cash in the benefits, contact us here.


The Cost of Building a Mobile App in 2021

What is the ballpark of building a mobile application? There are hundreds of estimates available on the web for this answer. However, they happen to be just that – an estimate. Now we know that developing a mobile application may have numerous variables. 

Your mobile application may end up costing $15,000 to $250,000 based on the features you are looking for. There are a few constants that contribute to the cost. Let’s have a look at them – 

Location of the team

Your team’s/ vendor’s location contributes significantly to your app’s development cost. The primary reason beyond this is the different wages based on the geographical location. Developers and designers have different costs across the US, Europe, and Asia. A developer in the US is paid $40-$100. In Asia, a developer with the same skill set and experience is paid $25-$35 per hour. Here is an approximate rate of Android and iOS developers across regions:

RegioniOS ($/hour)Android ($/hour)
North America150168
Australia110110
UK7070
South America4334
Eastern Europe3535
India3026
Indonesia1112

Your App type

After the location selection, the second factor is the application type. There are three options here – 

Web Applications 

  • They are websites with functionality and interactive elements, such as Gmail, Facebook, YouTube, Twitter, etc. 
  • They can be accessed via any browser, and therefore, there is no need to download them from any app store. 
  • Web apps are cost-effective and simple, primarily built using JavaScript, CSS, and HTML. There are no standard SDKs for web apps. 

Native Applications 

  • These applications are created using the language that is native to the operating system of the device in consideration. 
  • Objective C or Swift for iOS devices, Java or Kotlin for Android.
  • Their performance is par excellence. However, they are expensive to develop. 

Hybrid Applications

  • A mix of web apps and native apps. 
  • Helps in reaching out to a larger audience. 
  • Code maintenance is lesser vis-a-vis native apps. 
  • Easy access to the device’s hardware. 
  • Great application performance. 

Platform Selection

If opting for a native application, you can opt to develop your application on Android and iOS simultaneously. Alternatively, you can choose to launch your application on one of the platforms and then develop it for others after some time (e.g. Instagram).

How to make the right choice –  

  • Determine which platform has a greater chunk of your target audience
  • What resources you have if you go for developing apps for iOS vis-a-vis Android – Resource pool, access to development tools, SDKs
  • Will it make more sense to opt for cross-platform development

While there is no major difference in the cost of developing for iOS and Android, the cost will be more if you opt for developing your mobile application on both. 

Features and Functionalities

The basic features social login, push notifications, data encryption, media, messaging, search features. You will also need to decide if your application needs to be connected with the internet, payment gateway, geolocation (if required), third-party integrations, and so on. 

There will always be budget constraints. How to overcome this issue?

  • Prioritize your application’s features and also remember that every new feature will need additional cost and efforts of your team.
  • Determine the complexity of your app as it will have a direct impact on the timeline and cost. 

Design and Development Complexities 

The design and development complexities are a major determining factor in your app cost. Simple layouts, standard color schemes, limited options, icon and logo designs, copywriting; all are vital components of your design. And if these are not developed as you envisioned, it will lead to a lot of back and forth among teams. Make sure your developers and designers are on the same page always. 

What is the cost of building a mobile application in 2021? 

After reading this blog, we hope you know what goes into building a mobile application. You can expect additional costs to come your way as your app grows. This would include the maintenance cost, cost of additional features, storage of data, complex visuals, and so on. 

You may choose to outsource your mobile application development to experts who will help make the design and development journey smoother and swifter. 
Don’t take our word for it, Clutch recognized us as ‘Top development partner’, read all about it here. We are always open to building new relations and working on challenging projects, you can contact us here for an accurate app development estimation.

Google: Core Web Vitals For Search Engine Rankings

The new and improved page experience ranking for Google search is set to roll out in May 2021. This blog covers what the buzz is about. 

Google has introduced a new set of parameters – the ‘Core Web Vitals’ that will measure users’ experience ‘with speed, responsiveness, and visual stability of a webpage.

  • Largest Contentful Paint (LCP): This considers the loading time of the largest graphic element on the screen, i.e. Largest Contentful Paint. Such content can also be the main content of the website, so once the vital information is loaded, smaller elements follow. The ideal  LCP is set at 2.5 seconds 
  • First Input Delay: is the time taken by the page to become interactive, i.e. the response time of the page after the user initiates an action. The ideal FID is said to be less than 100ms. 
  • Cumulative Layout Shift: measures the visual stability of the website. It focuses on the time taken for all the elements of the website to become stable. The ideal CFS is less than 100ms. 

The Core Web Vitals will now be an intrinsic part of measuring the page performance, along with these factors-

  • Mobile responsiveness 
  • Safe browsing 
  • HTTPS security 
  • Intrusive interstitial guidelines

New labels for search results 

Google is contemplating adding labels in the search results, highlighting the pages that offer a better user experience. The current focus is on visual indicators that identify pages that met the predefined page experience criteria. 

However, this is still under the testing phase and the final call will be taken by Google in May 2021 based on the success of the tests. Google is staunchly recommending AMP to optimize the page experience signal.

Top stories courses for non-AMP content 

There was another announcement as well which said that non-AMP will soon be eligible for appearance in the Top Stories. 

The pages fulfilling the Google News content policies will have greater chances for Top stories carousel and greater user experience will be given priority in ranking.  

Our Recommendation

These updates will have an impact on your website’s traffic, therefore, we advise you to begin with the due diligence. You can check your Core Web Vitals stats here:

And in case you wish to talk more about the updates or need experts to handle the optimizations for your website, feel free to contact us here.

Saving Money on Product Development – Tips and Tricks

When it comes to product development, it’s good to shoot for the stars and be ambitious. Ideas are immense fun on paper; execution, however, is another story altogether. The viability of ideas surfaces only when we try to build on them. Without proper expectations, it’s easy to lose sight of what’s important and over-exhaust your budget. So, how to strike the right balance and build great products, within your budget without compromising quality? 

Planning is crucial

There’s a common mistake that people make while planning a product. They opt for outcome-based planning and not process-based. It doesn’t matter if you know everything at the outset, what matters is how you manage the risks.

Planning instead should be about:

  • Making assumptions about the reality of the product
  • How the production is going to work
  • What are the expected results?

What typical planning includes: 

  • Goals – Goals outline what you want your product to deliver. It could be increased sales, recognition, building a community, or providing a service. They help you determine your offerings – an app or a website, essential functionalities, and what channels will be the most suitable for the distribution of the product. They also assist in aligning the small tasks with the bigger picture.
  • Target group –  Identifying and understanding your customers is the most crucial thing to get right. You can start by filtering your customer base with age, place, lifestyle, and needs.  Focusing on a group will help you separate must-have features from the ones that are only for show.
     
  • Timeline – Developing and testing are just a part of the development cycle. You must also account for internal approvals and marketing activities early on while creating a timeline. The number of stakeholders involved and time taken for feedback can significantly affect the time to deploy. Setting an accurate and realistic schedule will have a direct impact on productivity. 
  • Budget – Needless to say, budget determines the direction and speed of product development. A well-defined budget will help you choose the right solutions and leverage the money at hand efficiently.
     
  • Solution – Deciding on the technologies is just as crucial as determining the budget. It’s always a good idea to consult specialists to choose the right set of technologies for your product. Utilize the discovery phase call with the specialists to pin down technologies best suited for your goals. Then use that information to build a detailed plan of product implementation.  

Simplicity over complexity

‘Keeping it simple’ is not only good for product transparency but it also aids in budget management. Unnecessary complexity is the foe for your product. 

Making the calls on essential features and cutting down on the ones you don’t need is the most effective money-saving advice in product development. While it’s easy to go down the path of excessive development for more features, it costs money. And not to forget, that today’s modular technologies allow us to easily add features in subsequent stages when the demand arises. Try taking the MVP route.

Bad choices are costly

Good products come at a price but cheaper alternatives cost more. A poor product leaves a bad taste on users, needs numerous refactors, and has serious vulnerabilities that require frequent patches. This eventually results in a far costlier, but inferior product. 

Go Agile 

By principle, Agile is doing the same amount of work but in short and iterative cycles that aids in tiny achievable goals with fewer delays and faster feedback implementation. Agile teams leverage instantaneous channels for communication to reduce the need for reworks because real-time communication facilitates active participation in the process and immediate reaction to potential errors. 

Outsource entirely

When you’re working on a complex project, outsourcing is one way to ensure that you have access to a large talent pool based on your project requirements. With outsourcing, you can choose between flexible engagement models and opt for the one which suits your budget and project requirements. You would know what to expect and ensure timely deliveries.

You can also hire resources in-house but this may not be the most cost-effective option. By outsourcing, you’re paying for the expertise that you need for a specific time. It is your instant and efficient access to the manpower that can often save significant time and money. 

Saving money on product development can be as easy as avoiding a few mistakes. We recommend that you use a sensible mixture of the above tips and save a substantial amount while maintaining the product quality. 

Swift 5.4 | New Features and Updates

Swift is the preferred programming language for the Apple ecosystem. It’s a safe, fast, and interactive option that combines the best in Apple’s engineering culture and the contributions from its open-source community. 

With the Swift 5.4 update, there is a significant improvement in the compilation, result builders entry, better code completion in expressions, and so on. Let’s see all the major updates that this new release has in store for us. 

Result builders

Function builders were unofficially a part of Swift 5.1. With this update, they are now formally here named as result builders. 

New result builders can now be defined with the help of new structs via @resultBuilder. This attribute informs SwiftUI which type to be considered as a result builder. However, all result builders need to define at least one static function.  

Implicit member syntax extension

There is an improved way of using implicit member expressions. There is now support for chains of static functions as opposed to a single static member earlier. The compiler can comprehend multiple chained members and act accordingly. 

Multiple variadic parameters in functions

Before this update, you had just one variadic parameter. To elaborate, there is now the possibility to use multiple variadic parameters in functions, subscripts, initializers, and methods. The only condition here is that all these parameters should have labels.  

For example, now one can create a function that will store which team won a particular football match and followed by a second parameter that will store the names of the players that scored the maximum touchdowns. 

Changes in local functions

Local functions now have overloading support. Meaning, nested functions can be overloaded and Swift can select which one gets to run based upon the types that are in use. 

Support for property wrappers

Introduced in 5.1, property wrappers were implemented to attach extra functionality to properties easily. This is now extended to include support for local variables too. 
All the changes mentioned above are well-received in the developers’ community so far. Do let us know which upgrade are you liking the best and which updates/ features are missing in your opinion.

Why are external code audits important?

It’s a common industry practice for applications to utilize and reuse codes written by other programmers. Although it’s an efficient way of building applications, you might not be fully aware of the vulnerabilities in the code, since it’s not yours, to begin with. That’s where External Code Audits come into the picture. It takes that unknown out of the equation. 

Apart from spotting errors and improving your code external audits will also help you understand the underlying composition, licensing, and obligations. In this blog, we’ll uncover why it’s important to conduct external code audits.We have also covered Code Review best practices in our earlier blog. Read it here.

Improved programming quality

Source code reviews are as important as QA. It not only ensures the highest code quality but also makes it easier for developers to improve overall software performance and add new features for expansion. Improved quality of code and optimized performance means, no need to allocate critical time and resources to solve technical issues and errors.   

External code audits may also help surface any code debt which came as a result of using code created by other developers. 

It saves you money

The time taken for bug detection is related to the fixing costs. Therefore, the longer it takes to detect the bugs, the costlier it gets. You can significantly reduce the cost of development by simply detecting bugs as early as possible. External code audits bring in extra hands to multiply audit efforts and cut the time by a significant margin, providing a direct cost advantage. 

External developers can easily detect mistakes made by other developers, as it’s fresh for them and they have no other obligation other than shipping the best possible version of that code.

Streamlines development

When an engineer (not just developers) does one thing a million times, it gets harder to see subtle mistakes and efficient alternatives. That’s why QA engineers, editors, and supervisors are there. External code audits can help surface inefficiencies in the code and mistakes that go undetected. If given a pass, these mistakes can cause critical development issues and undermine the project management. 

Helps upskill new coders

If you have new and less experienced developers in your team, external code audits can be eye-opening. It can help them improve their skill and learn about different modules, workarounds, and coding practices. Through this practice, the newcomers can come out as experienced coders after learning from their mistakes pointed out during the reviews. 

Improves Project estimation accuracy

Reviewers performing code audits are people who are very familiar with the codebase you’re dealing with. There is a great chance that they already know the underlying common issues with the codebase and can recommend solutions based on the complexity of your project.  Knowing about the issues and possible workarounds beforehand will give you an edge and help you make more precise project estimates, in terms of cost, time, and resources.

Consistent code across the software

When you’re working on complex projects, consistency becomes a challenge. Code audits help maintain consistency in your code throughout the software development project. External developers will keep a watchful eye on the coding style and any other element that needs to be consistent for better understanding and easier transitions in the future. 

Conclusion

Software development, like any other process, is collaborative and when things exchange hands, it creates room for flaws. External code audits eliminate those possibilities while optimizing and speeding up development in the process.

About Galaxy Weblinks

We specialize in delivering end-to-end software design & development services and have hands-on experience with large, medium, and startup business development requirements. Our engineers also help in improving security, reliability, and features to make sure your business application scale and remains secure.

Unveiling Android 12 | Updates and Enhancements

The developer preview of Android 12 is now available and Google has placed heavy emphasis on app compatibility, privacy, and accessibility of all users. As always, Pixel phones will be the first to receive the update probably around September 2021, followed by billions of other android phones.

In this preview, the UI receives some tweaks and features enhancements in Android 12 (Code-named Snowcone). Let’s see what they are-

Change in Accent Color

The white background color in the drop-down menu and settings menu is now being changed with a pale light-blue tint. It can be seen in both light and dark themes.

Nearby Share for Wi-Fi passwords

Connecting to a new Wi-Fi is now easier with the help of ‘Nearby Share’ for sharing Wi-Fi passwords. The QR code scanner option is present; if you scroll down, you will spot this new option which will look for devices near you for sharing the details.

Changes in Notifications

There are changes seen in the layout of text and visuals along with tweaks in transparency and background. The overlay is lighter in shade and the background is more translucent.

Also, the new notifications snooze now comes with three different time-durations – 30 mins, 1 hour, or 2 hours. Although this option is disabled by default, you can enable it from settings by going on the ‘allow notification snoozing’ under the notification head.

Editing Screenshots 

One can add text in varying fonts and colors on the screenshots. The markup menu will also feature emojis just in case your screenshots need extra flair.

Along with edits for screenshots, you can edit any outgoing image file via a share sheet. When you share an image file, there will be an ‘Edit’ option that enables you to make edits to your selected file.

Media Player Interface 

In the drop-down menu, you will notice a change in the media player. The widget now occupies more space, expanding till the screen edges and takes more space on the lock screen as well when in use.

You can select which apps are shown in the media control and which are restricted. This can be done via Settings > Sound and vibration > Media.

Changes in Accessibility Settings   

Accessibility settings are also reorganized. Font size, display size are grouped under ‘Text and Display’. There was a horizontal line that used to divide different menu options which are now removed.

Privacy Settings

Privacy toggles can be used to block the usage of the camera and microphone. Users will be notified when an app uses either of these functions. In the Privacy Settings, the preview also features an option to disable the phone camera and mute the microphone completely.

Some rumored changes are also creating buzz, like:

  • OS updates could be done directly from Play Store. If this is implemented, it will lead to more frequent updates.
  • Audio-coupled haptic feedback/effects could be seen in Pixel phones. As of now, only the Pixel 4 is believed to have the hardware to implement this feature. This signifies that there can be vibrations in the haptic motors to match the rhythms of the music played.
  • Double-tap gesture for Pixel phones on the back of the phone. This can be done by activating Google Assistant. It can be used for other options as well like taking a screenshot or pausing/ playing media, etc
  • ‘One-handed’ mode is believed to have a feature called, ‘Silky Home’ which will push features further down, making them more accessible. Apart from this, one expects more blank space to be left on the top of the display.

We are eager to see how this update pans out and what effects it will have on app design and development. If all goes well, it will give a lot more control to users’ hands.

About us We, at Galaxy Weblinks, are all for new ideas and experiments. We believe that being up-to-date in this fast-paced world gives us adequate time to explore and implement new changes. Our analytics team is proficient in building apps that are well aligned to our client’s and platform requirements. Contact us for a free consultation!

Code Review | Foolproof Your Software Quality

Code reviews can be tedious and if the code is somebody else’s then some frustration is justified. However, code reviews do save a lot of time and keep breaking errors in check.

Based on the scale of your project you can either go with peer review or with group review. When you’re confident about your code and are in a time crunch, you can choose to get your colleague to review your code. This way, you get an error-free code that can be pushed for production. On the other hand, if the project scale and team size are larger, you can opt for a group review. Let’s explore both these options –

What is a Peer Code Review?

Simply put, when you ask one of your teammates to see if there are any mistakes or areas of improvement in your code.

The Process

Typically, when the code is complete and ready for review, the developer creates a request to get it reviewed and forward it for release once approved. The assigned reviewers then approve or reject the pull request depending on the quality of the code. If approved, it implies that the code is ready to be merged in the release branch. Just to an additional layer of assurance

To ensure the highest code quality and keep a check on code churn, practice heads like development lead and engineering head are also added default reviewers. They are notified via emails about the requests along with developers that are doing the review. These reviews are dynamic and are done as and when the pull requests are created.

What to Look for During the Review

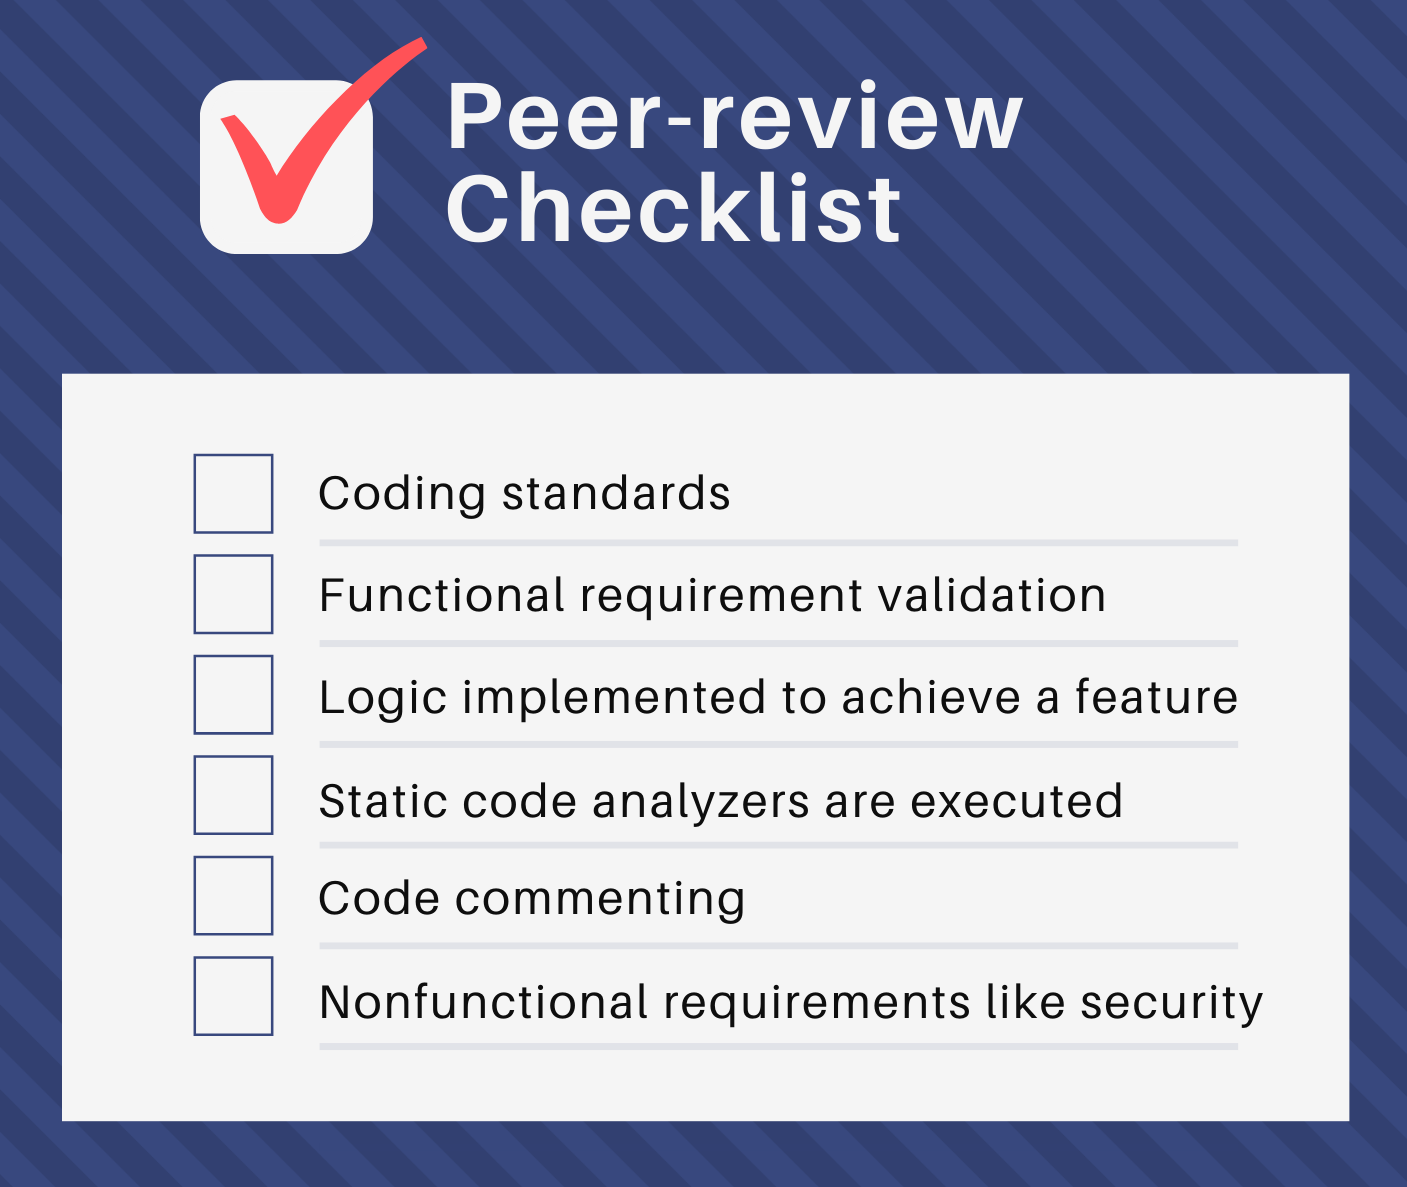
Even though there are multiple sets of eyes involved, there’s a lot that can still go wrong with peer reviews, if not taken seriously. Blanket approvals will only set you back further. Different teammates might have different standards of code quality, in that case, a checklist can help people align.

Peer-review Checklist 

peer-review-code

This checklist can help the reviewers prioritize what matters and find out defects before the code goes for production.

What is a Team Code Review?

It’s like peer review but more people are brought in for this and review the code as a group. The motive here is to bring different sets of people with different expertise onboard to test the overall feasibility of the code. Think Developers, Testers, Architects, and Managers gathering weekly for code review.

The Process

Since a lot many people are involved in a group review, it calls for a slightly different approach than the one used in peer review.

  • The developer presents the user story to the entire team.
  • Review of the design as per the user story implementation.
  • Then the code is discussed and reviewed by the review group.
  • Test cases are compared with the business rules implemented in a user story.
  • Code walkthrough is done to get the logic across to every individual, sanitizing the code in the process
  • SQE group presents the test cases based on the user story.
  • Database dependencies like table schema, initial data scripts, data upgrade scripts are then reviewed by the DB team.
  • The Release Engineering team is then brought in to discuss and review the dependencies on the deployment scripts.
  • The performance team then gets inputs and benchmarks performance for the user story.

Who looks for what during these reviews?

Developers will use other stories as a basis and compare from a coding perspective to see if there are any dependencies.

Testers will look for business rules that are part of the test cases and try to circle out the ones that are not if implemented.

The architect ensures that everything is as planned and according to the initial blueprint. And if all the design principles and best practices are employed to ensure software quality.

Teams like Database, Release Engineering, and Performance Engineering will look for dependencies in their area of expertise.

Why Team Code Review

  • It helps break the practice and mentality of working in silos which prevents interaction across teams.
  • It’s easier to spot errors with multiple eyes on your code
  • Testers help identify functional gaps before it’s too late
  • The architect will keep shortcuts in check
  • The shared services team will get inputs for executing the corresponding steps in their area of expertise.

Code reviews can seem like a marginal change to your process but the results are quite significant. One of the most overseen benefits of these group code reviews is to bring teams together. And when they are working as a whole instead of domain-made silos, great products emerge. It also serves as a learning opportunity for a lot of people. People who come from different domains and junior resources are just starting.

And of course, this bi-directional learning process will help keep your code symmetrical across systems while keeping it maintainable, scalable, readable, and of the best quality.

About Galaxy Weblinks

We specialize in delivering end-to-end software design & development services and have hands-on experience with large, medium, and startup business development requirements. Our engineers also help in improving security, reliability, and features to make sure your business application scale and remains secure.

7 Best Practices For React Security

React is undoubtedly one of the most popular JS libraries to build applications. It is also one of the most actively developed libraries which means instant bug fixes and security patches. React has many advantages, but may fall susceptible to security threats. Here are a few recommendations that we share based on our vast experience of working with this technology.

(Know more about our proficiency in Front-end Technologies)

Cross-site scripts and URL injections are some of the most common and serious attacks that affect applications in general. These vulnerabilities are targeted to steal sensitive user data and capture user input to steal credentials and card information.

We have made a list of some best practices that will help you enhance the security of React applications. Do have a look!

Protection against XSS

Your application may have some vulnerabilities that hackers can exploit and insert data in your code that your app treats as part of the code. This in turn gives the attacker the access to make requests to the server and even captures user inputs to steal sensitive credentials.

The injection might look like this:

Code!<script>alert(“malicious code”)</script>

Here’s what the same thing looks like with some protection against XSS:

Code!&lt;script&gt;alert(“malicious code”)&lt;/script&gt;

&lt; and &lt; being interpreted as < and >, the browser won’t confuse the data for code.

You can also use:

  • Using the createElement() API.
  • Using JSX auto escape feature.
  • Using dangerouslySetInnerHTML to set HTML directly from React instead of using the error-prone innerHTML.

Adding End-to-End Encryption

Almost every real-time communication application that you’re using comes with End-to-End encryption as standard.

End-to-end encryption means that nobody else other than the parties involved can read the messages. It’s made possible by encryption technology that ensures that the message is encrypted just as it leaves the sender and can only be read once it reaches the intended receiver.

To get E2E in your React application you have to rely on a vendor that provides the tools and kits to ensure secure encryption. Virgil for example is a vendor that provides a platform and JavaScript SDK to create, store, and offer robust E2E secure encryption via public/private key technology.

HTTP Authentication

There are several ways to make authentication secure in your application. Pay special attention to the client-side authentication and authorization because typically they’re ones subject to security flaws.

You can use one of these to ensure your application safety

JSON Web Token (JWT)

  • Move your tokens from localstorage to an HTTP cookie since it’s fairly easy to extract from local storage.
  • Keep, sign, and verify the secret keys in the backend
  • Avoid decoding the token on the client-side and ensure that the payload is small.
  • HTTPS over HTTP under any circumstances

Other methods:

  • OAuth
  • AuthO
  • React Router
  • PassportJs

Rendering HTML

You should always sanitize dynamic values that you assign to dangerouslySetInnerHTML. The recommended sanitizer to use is DOMPurify.

Import purify from “dompurify”;

<div dangerouslySetInnerHTML={{ __html:purify.sanitize(data) }} />

DDoS prevention

Denial of service happens when the app is not secure or it’s unsuccessful in masking the IPs of services. As a result, some services stop because they can’t interact with the server.

One way to deal with these issues is to just limit the number of requests to a given IP from a specific source.

Or you can always- 

  • Add app-level restrictions to the API.
  • Make calls on the server and NOT on the client-side.
  • Add some tests to secure the app layer.

Keep Your Dependencies Updated

There are a lot of third-party dependencies that you use that are patched regularly for security reasons. They can prove to be risky if not updated.

Update your dependencies regularly via security patches and ensure that you leave no backdoor vulnerable for attacks. Try using npm-check-updates to discover dependencies that are out of date. And update if needed to ensure that you’re covered.

Keep An Eye On Library Code

Third-party libraries. Useful? Yes. Risky? A little.

These libraries, modules, or APIs in most cases will help you fast track your development but sometimes they might take your application down with their flaws.

That shouldn’t stop you from using some great third-party offerings. Just a word of caution though, ensure that you are aware of the vulnerabilities, their scale, and workarounds.

And lastly, keep them updated and patch the old ones, just to make your application airtight.

We hope that you find these practices useful and employ some or all to keep your React applications secure and in shape. Do let us know if you’re struggling with some enterprise-wide dependable implementation, we are here to lend a hand. Get in touch with us here.

5 Tools For Efficiently Managing Technical Debt

In our previous article, we talked about what is technical debt and how one strikes a balance between juggling code quality and its timely delivery. In this new blog, we have come up with a list of tools that will help you and your developers for assessing and acting on the analysis of your technical debt.

Let’s see what the tools are.

SonarQube

SonarQube, early known as Sonar, is an open-source platform that assists developers in improving their code quality. It comes with two customizable dashboards, called Global and Project. This makes it very clean as you can add or remove widgets as per your requirement. It supports more than 20 programming languages.

Widgets provide information like the number of days required (in terms of human resource) to fix code base issues, your technical debt ratio, technical debt pyramid, and many more details. All this makes your developer and QA testers’ life a bit easier and helps in keeping the reins of technical debt in check.

Bliss

Bliss focuses on your coding and testing quality. It’s a dashboard that uses numerous static analyzers for any reported flags and consolidates the said data for your team. Bliss helps in understanding the origin of how your technical debt accumulated over some time to a certain extent.

Integration with code repositories like Github, BitBucket keeps you informed on how your team code is and helps you understand what can be changed.

SQUORE

Squore is a commercial tool, but the setup is pretty easy. Squore is split into two sections, on the left are the projects, artifacts, and technical debt indicators, on the right, are various widgets.

It considers four factors for calculating technical debt. This includes efficiency, portability, maintainability, and reliability. When there is a violation detected in code, it’s added to the indicators and goes in the subset of that particular indicator as well.

You will also be able to see the distribution of your technical debt across functions, making it easier for your team to prioritize their tasks.

Teamscale

Yet another commercial tool Teamscale helps in assessing and controlling your code quality. It promotes transparency among your team members via clone detection for any redundancies in your code, unwanted dependencies with the help of architecture conformance analysis, and bug detection.

It is compatible with all major languages and version control systems. Using an incremental analysis engine delivers speedy feedback and sheds light on the root causes for potential issues. You will also get various IDE options, like plugins for Eclipse, NetBeans, IntelliJ, and Visual Studio.

Kiuwan

Kiuwan is a SaaS-based commercial solution for code quality management. It has plans which offer static analysis, duplicate code detection, technical debt computation, what-if analysis, and possible solution road maps. This all is presented in user-friendly and customizable dashboards.

The dashboard is very easy to understand. On the left side of the dashboard, you will find a list of your analyzed projects and on the right, there will be quality analysis information. Kiuwan uses the “Checking Quality Model” which consists of five indicators, maintainability, reliability, portability, efficiency, and security for assessing your projects. And with this, there is a risk index and efforts to target the index as well.

All the tools mentioned above have been here for quite some time but unless you consider your resources and prospects, picking one will be difficult. But as the experts say, you can not go debt-free ever, neither debt is negative in every scenario. You need to strike a balance between timely code delivery and least compromise on quality ensuring that your technical debt never boomerangs back on you.

You can get in touch with us for any technical debt issues and maintaining manageable levels of the same, we are just a click away.